Working with Packages
In this lesson we will learn how to create a Julia package. A Julia package usually contains a module and the information on the dependencies of such module. The advantage of creating a package instead of just a module is that it is possible to precompile the package (thus successive loading of the package will be faster, especially for bigger modules) and it will be easier to install all the dependencies needed for the module to work properly.
Creation of a package
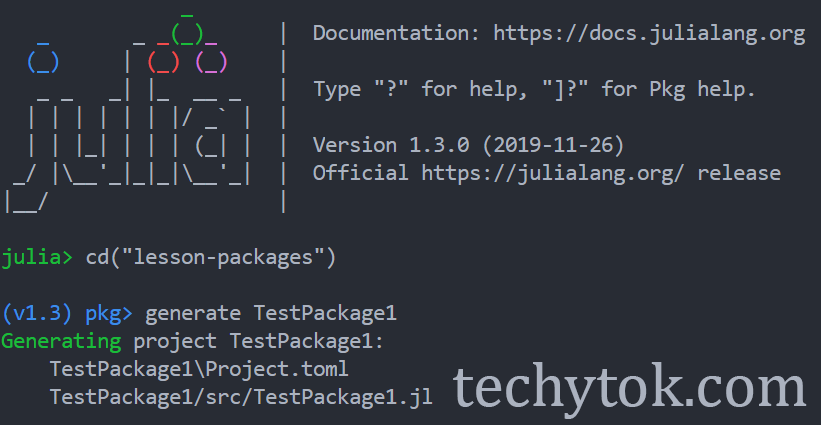
To create a package please type ] in the REPL to access the package manager and type
generate TestPackage1
You should see something similar in the REPL:

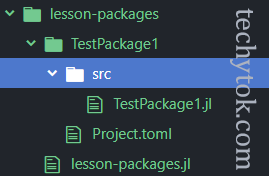
If the package creation process has been successful, a new package directory should appear inside your working directory:

Inside the file found at TestPackage1/src/TestPackage1.jl you can see the following lines:
module TestPackage1

greet() = print("Hello World!")

end # module
This is the skeleton of the package, we can modify the module according to our needs and we can treat this module in the same way as we would do with a normal module, what changes is the way to import the module/package inside our project.
Using a user defined package
In order to use an user defined package, we need to activate that package. First of all, make sure that your current working directory is the same as the directory where the package has been created. To check your project working directory, please type pwd(). If the directory is different (it shouldn’t be), you can change the current working directory with cd("/path/to/directory").
To summarise, if the package is found at /lesson-packages/TestModule1, the working directory should be /lesson-packages.
We can now activate the package and test it through the following code:
using Pkg
Pkg.activate("TestPackage1")

#%%
using TestPackage1

TestPackage1.greet()

As you can see at line 5, there is no need to add a . before the name of the package, as it recognised as an “official” package and not an user defined package.
Adding dependencies
Let’s suppose we want to write some functions which make use of external libraries, for example SpecialFunctions, we can add a dependency to the project in the following way:
- type
]to enter the package manager - type
add PackageNameto add the package as a dependency
Please type in the REPL ] add SpecialFunctions

Some output has been omitted for the sake of brevity.
Once a package has been added to the project, it is possible to use it inside the module, so let’s modify TestModule1.jl in the following way:
module TestPackage1
using SpecialFunctions

export mySpecialFunction

greet() = print("Hello World!")

function mySpecialFunction(x)
    return x^2 * gamma(x)
end

end # module
And now we can call mySpecialFunction
using Pkg
Pkg.activate("TestPackage1")

using TestPackage1

TestPackage1.mySpecialFunction(42)
When you change something inside a package, remember to restart the REPL for the changes to take place.
Package initialisation
If we share the package with someone or we want to reinstall a package on another machine, it is possible to automatically install all the dependencies required for the project.
In order to do so, activate the package normally as we did before and then type the following code:
using Pkg
Pkg.instantiate()
You can find more information on how to write and use packages at the official documentation.
Conclusions
In this lesson we have learnt how to create a package and how to import it inside our project. Furthermore, we have learnt how to add dependencies to a package and how to automatically install the dependencies required for a package.
If you liked this lesson and you would like to receive further updates on what is being published on this website, I encourage you to subscribe to the newsletter! If you have any question or suggestion, please post them in the discussion below!
Thank you for reading this lesson and see you soon on TechyTok!


Leave a comment