

Messaging with Telegram
In this lesson we will learn how to send text and file messages to your devices using Telegram.jl
Telegram
Telegram is a popular instant messaging app with cross platform support for almost any operating system and smartphone. Unlike other messaging clients, Telegram offers the possibility to use one account on many different devices, which is particularly convenient if we want to read our messages both on our phones and PC.
What makes Telegram unique and extremely useful to us, is the possibility to send text and file data from Julia directly to our device, and receive notifications on incoming messages too!
Imagine running a long computation, you don’t know when it will finish, but sure you know that you want to receive the results as soon as they are available! This is possible using the Telegram.jl package, for example sending a message saying the computation is done and maybe forwarding some results or images, so that you don’t need to reach your PC to see how things went.
We will now proceed to configure Telegram.
Create an account
First of all, we need to install Telegram. You can either install Telegram on your phone or your PC, for this tutorial we will assume that you have installed the app on your PC, but the procedure is identical if you are using your phone.
First download and install Telegram from the official page and then create an account. You will need a valid phone number and you will be asked to enter some additional details.
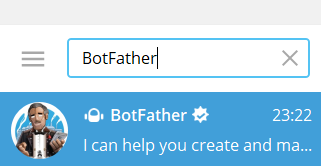
Once you have installed Telegram, please type in the search box (upper left) BotFather. Select the BotFather chat:
This is a bot which is used to make other bots. A bot is essentially an automatic interface which can be programmed to perform certain actions. In our case, we will command the bot from Julia and we will make it send messages on our behalf.
In the BotFather chat, type /start or press the start button to initiate a conversation with the Bot Father.
Now type /newbot to enter the bot creation mode. We will be asked:
Alright, a new bot. How are we going to call it? Please choose a name for your bot.
And we will need to choose the name of the bot. In my case, I’m going to choose Techytok Bot. Please in your tests choose another one as this one won’t be available.
Now the Bot Father will ask us:
Good. Now let’s choose a username for your bot. It must end in
bot. Like this, for example: TetrisBot or tetris_bot.
For this tutorial we will go with TechyTokBot. Please, choose another name when you are trying out this tutorial, as names must be unique.
You will receive a message with a token which should look like 123456:ababababababbabababababbababaab. Please take note of this token and keep it safe and secret, as anybody with this token will be able to send messages on the bot’s behalf.
To check whether the bot creation was successful, click on the link provided in the message from the Bot Father, it should look like t.me/TechyTokBot. You should find yourself in a chat with your bot. Press start to initiate a conversation with the bot.
We are now ready to install Telegram.jl and configure it.
Telegram.jl
To install Telegram.jl, open the Julia REPL and type:
using Pkg
Pkg.add("Telegram")
Once the package is installed, we need to retrieve the id of our chat with the bot. To do so please run the following code:
using Telegram

bot_token = "123456:ababababababbabababababbababaab"

tg = TelegramClient(bot_token)

run_bot() do msg
    println(msg)
end
Please replace 123456:ababababababbabababababbababaab with the token you got from the Bot Father.
Now open the telegram app and type any message in the chat with your bot (Techytok Bot in my case). In the Julia REPL you will see something like this:
{
   "update_id": 87654321,
     "message": {
                   "message_id": 6789,
                         "from": {
                                               "id": 123456789,
                                           "is_bot": false,
                                    "language_code": "en"
                                 },
                         "chat": {
                                            "id": 123456789,
                                          "type": "private"
                                 },
                         "date": 1592767594,
                         "text": "Hello"
                }
}
Which means that the bot successfully received your message.
Please take note of the ID at line 11 right after “chat”: yours will be different and you will need it in the next step, so please copy it.
Now you can interrupt/stop the Julia REPL (CTRL+C) and we can finish the setup of the bot.
Modify your code to be like the following snippet:
using Telegram

bot_token = "123456:ababababababbabababababbababaab"
chat_id = "123456789"
Where chat_id is the id you have retrieved in the previous step.
We are now ready to connect to the chat with the bot:
tg = TelegramClient(bot_token, chat_id = chat_id)
You can now test if the setup is correct by sending a text message through the bot:
Telegram.sendMessage(tg, text = "Hello world! This is TechyTok!")
You should now receive a notification on your phone and you should see the message you have sent.
It is also possible to send files or images in a similar way:
# send an image
Telegram.sendPhoto(tg, photo = open("path/to/picture.jpg", "r"))

# send an file
Telegram.sendDocument(tg, document = open("path/to/document.txt", "r"))
Remember to specify the relative (or absolute) path to the file that you want to send.
A safer way to send files would be:
open("path/to/picture.jpg", "r") do io
    sendPhoto(tg, photo = io)
end
This way you can be sure that the file will get closed once it has been sent.
It is also possible to send memory objects:
io = IOBuffer()
print(io, "Hello world!")
Telegram.sendDocument(document = "hello.txt" => io)
For more information on what is possible to do with Telegram.jl, please refer to the official documentation.
For example, it is possible to use Telegram as a remote logger for messages and errors: https://arkoniak.github.io/Telegram.jl/stable/usage/#Logging, or send messages to several different chats. It is even possible to code bots which will interact with the input sent by users in the respective chats.
Conclusions
In this tutorial we have learnt how to create a Telegram bot and how to setup Telegram.jl to send messages to our account. Furthermore we have seen how it is possible to send several kinds of data, including documents and photos.
If you’ve found Telegram.jl useful, don’t forget to star the official GitHub repository!
If you liked this lesson and you would like to receive further updates on what is being published on this website, I encourage you to subscribe to the newsletter! If you have any question or suggestion, please post them in the discussion below!
Thank you for reading this lesson and see you soon on TechyTok!


Leave a comment